In this tutorial I describe how you can setup Wicket 1.5 to use Spring Security 3.1 for authentication and Wicket Auth/Roles for authorization.
Spring Security is a very complete and flexible solution for all kinds of security needs. It offers a lot of functionality out-of-the-box and it is quite easy to extend to fit your own custom needs. Visit the Spring Security website (http://static.springsource.org/spring-security/site/index.html) for more information.
Wicket Auth/Roles makes it easy to annotate components with authorization information. E.g., the @AuthorizeInstantiation configures what roles are allowed to instantiate the annotated component or package, and the @AuthorizeAction annotation controls wether the component is rendered or not based on the roles.
At the and of this tutorial you will have a sample Wicket project that uses Spring Security to look up the user – including roles, full name, etc. -, validate the password, and manage the current user session. Wicket Auth/Roles validates whether the current user has access to a particular page, or even a particular component.
Prerequisites:
- JDK 7.x
- Maven 3.x
- a recent version of the Eclipse IDE for Java EE Developers
- the m2e – Maven Integration for Eclipse
Please not that during the writing of this tutorial I ran into a bug with Wicket version 1.5.6, which causes the FeedbackPanel to not render messages on stateless pages. See https://issues.apache.org/jira/browse/WICKET-4536. So for now, use version 1.5.5 (or 1.5.7 when it’s released).
Create a new Wicket project
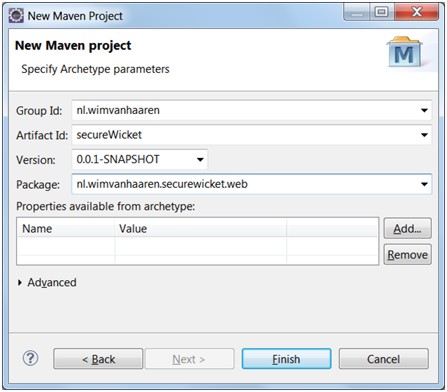
Create a new Maven project from within Eclipse using the wicket-archetype. Press Ctrl+N and select MavenMaven Project. Next, select the maven-archetype-quickstart 1.5.5 and enter your desired Archetype Parameters.
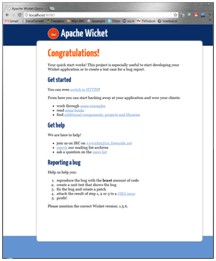
To verify that everything is working correctly, run Start.java as a Java application en browse to http://localhost:8080/. You should see something like the following:
Change the location of the html files
By default Wicket expects the html files to live next to the Java source files, in the same package and also in the src/main/java folder. However, if like me you prefer your html files to be stored inside the src/main/webapp folder you could do one of two things.
If you don’t mind the html files still residing within the same package as the corresponding .java files, the easiest way to change this is to add the following lines to your pom.xml files within the <resources> element:
|
1 2 3 4 |
<resource> <filtering>false</filtering> <directory>src/main/webapp</directory> </resource> |
However, if you also want to strip the Java package structure from the html files you’ll have to implement a custom ResourceStreamLocator that tells Wicket where it should get the html files from. This is especially useful if you want to maintain a deep Java package ordering for your Java source code but want your webapp folder to have a more “natural” structure to it. For example, by default Wicket will try to find the html file for com.example.MyPage.java by looking for the file com/example/MyPage.html. With a custom ResourceStreamLocator you can configure Wicket to look for just MyPage.html.
To create a custom ResourceStreamLocator create a new class that extends ResourceStreamLocator and override two methods:
|
1 2 3 4 5 6 7 8 9 10 11 12 13 14 15 16 17 18 19 20 21 22 23 24 25 26 27 28 29 30 31 32 33 34 35 36 37 38 39 40 41 42 43 44 |
package nl.wimvanhaaren.wicket; import java.util.Locale; import org.apache.wicket.util.file.IResourceFinder; import org.apache.wicket.util.resource.IResourceStream; import org.apache.wicket.util.resource.locator.ResourceStreamLocator; import org.apache.wicket.util.string.Strings; public class WebResourceStreamLocator extends ResourceStreamLocator { /** If null, the application registered finder will be used */ private IResourceFinder resourceFinder; public WebResourceStreamLocator() { } public WebResourceStreamLocator(final IResourceFinder resourceFinder) { this.resourceFinder = resourceFinder; } @Override public IResourceStream locate(Class<?> clazz, String path, String style, String variation, Locale locale, String extension, boolean strict) { String simpleFileName = Strings.lastPathComponent(clazz.getName(), '.') + "." + extension; IResourceStream stream = locate(clazz, simpleFileName); if (stream != null) { return stream; } else { return super.locate(clazz, path, style, variation, locale, extension, strict); } } @Override protected IResourceStream locateByResourceFinder(Class<?> clazz, String path) { IResourceStream resourceStream = resourceFinder.find(clazz, path); if (resourceStream == null) { // try using the class loader resourceStream = locateByClassLoader(clazz, path); } return resourceStream; } } |
Next, you have to tell Wicket to use your custom ResourceStreamLocator. To do so, edit your Wicket Application class and add the following lines to the init() method:
|
1 2 3 4 |
// Use our custom resource finder WebApplicationPath webContainerPathFinder = new WebApplicationPath(getServletContext()); WebResourceStreamLocator resourceStreamLocator = new WebResourceStreamLocator(webContainerPathFinder); getResourceSettings().setResourceStreamLocator(resourceStreamLocator); |
Spring 3.1 integration
dependencies
To integrate Spring 3.1.0 with Wicket 1.5.5 you first need to add the dependencies for both frameworks to your pom.xml. Next, to actually make them cooperate you also have to add the wicket-spring dependency:
|
1 2 3 4 5 6 7 8 9 10 11 12 13 14 15 16 17 18 19 20 21 22 23 24 25 26 27 28 29 30 31 32 33 34 35 36 37 38 39 40 41 42 43 44 45 46 47 48 |
<properties> <wicket.version>1.5.6</wicket.version> <spring.version>3.1.0.RELEASE</spring.version> <jetty.version>7.5.0.v20110901</jetty.version> </properties> <dependencies> <!-- WICKET DEPENDENCIES --> <dependency> <groupId>org.apache.wicket</groupId> <artifactId>wicket-core</artifactId> <version>${wicket.version}</version> </dependency> <!-- SPRING INTEGRATION --> <dependency> <groupId>org.apache.wicket</groupId> <artifactId>wicket-spring</artifactId> <version>${wicket.version}</version> <exclusions> <exclusion> <groupId>org.springframework</groupId> <artifactId>spring</artifactId> </exclusion> </exclusions> </dependency> <dependency> <groupId>org.apache.wicket</groupId> <artifactId>wicket-ioc</artifactId> <version>${wicket.version}</version> </dependency> <!-- SPRING --> <dependency> <groupId>javax.inject</groupId> <artifactId>javax.inject</artifactId> <version>1</version> </dependency> <dependency> <groupId>org.springframework</groupId> <artifactId>spring-context</artifactId> <version>${spring.version}</version> </dependency> <dependency> <groupId>org.springframework</groupId> <artifactId>spring-web</artifactId> <version>${spring.version}</version> </dependency> |
Spring code
Create a Spring bean HelloWorldService:
|
1 2 3 4 5 6 7 |
package nl.wimvanhaaren.securewicket.services; public interface HelloWorldService { public String sayHello(); } |
|
1 2 3 4 5 6 7 8 9 10 11 12 |
package nl.wimvanhaaren.securewicket.services; import org.springframework.stereotype.Service; @Service public class DefaultHelloWorldService implements HelloWorldService { public String sayHello() { return "Hello World from Spring"; } } |
Create a standard Spring applicationContext.xml file under your WEB-INF directory with the annotation scanning enabled:
|
1 2 3 4 5 6 7 8 9 10 11 12 13 14 15 |
<?xml version="1.0" encoding="UTF-8"?> <beans xmlns="http://www.springframework.org/schema/beans" xmlns:xsi="http://www.w3.org/2001/XMLSchema-instance" xmlns:context="http://www.springframework.org/schema/context" xsi:schemaLocation="http://www.springframework.org/schema/beans http://www.springframework.org/schema/beans/spring-beans-3.1.xsd http://www.springframework.org/schema/context http://www.springframework.org/schema/context/spring-context-3.1.xsd http://www.springframework.org/schema/beans http://www.springframework.org/schema/beans/spring-beans-3.1.xsd"> <!-- Enable annotation scanning --> <context:component-scan base-package="nl.wimvanhaaren.securewicket" /> </beans> |
Integrating Spring with Wicket
Add the following line of code to the init() method in your Wicket Application class:
|
1 2 |
// Integrate Spring with Wicket getComponentInstantiationListeners().add(new SpringComponentInjector(this)); |
Edit your web.xml and add a Spring ContextLoaderListener:
|
1 2 3 |
<listener> <listener-class>org.springframework.web.context.ContextLoaderListener</listener-class> </listener> |
Now you can finally inject Spring beans into your Wicket components using the @SpringBean annotation. First, add <h1 wicket:id=”msg”></h1> somewhere in the HomePage.html file. Next, edit HomePage.java and inject the HelloWorldService:
|
1 2 3 4 5 6 7 8 9 10 11 12 13 14 15 16 17 18 19 20 21 |
package nl.wimvanhaaren.securewicket.web; import nl.wimvanhaaren.securewicket.services.HelloWorldService; import org.apache.wicket.request.mapper.parameter.PageParameters; import org.apache.wicket.spring.injection.annot.SpringBean; import org.apache.wicket.markup.html.basic.Label; import org.apache.wicket.markup.html.WebPage; public class HomePage extends WebPage { private static final long serialVersionUID = 1L; @SpringBean private HelloWorldService helloWorldService; public HomePage(final PageParameters parameters) { add(new Label("msg", helloWorldService.sayHello())); add(new Label("version", getApplication().getFrameworkSettings().getVersion())); } } |
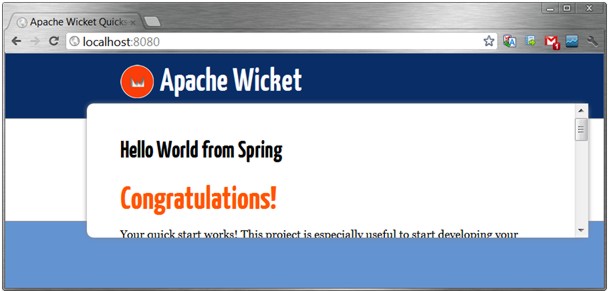
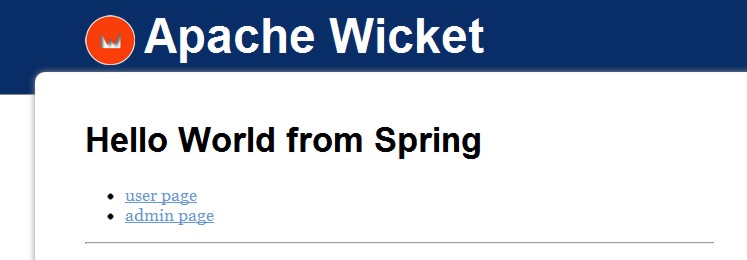
If you run your application and fire up a browser to http://localhost:8080 you should see the message from the Spring bean:
Spring Security for authentication and Wicket Auth/Roles for authorization
Dependencies
Add the following dependencies to your pom.xml:
|
1 2 3 4 5 6 7 8 9 10 11 12 13 14 15 16 17 18 19 20 21 22 23 24 25 |
<dependency> <groupId>org.apache.wicket</groupId> <artifactId>wicket-auth-roles</artifactId> <version>${wicket.version}</version> </dependency> <dependency> <groupId>org.springframework.security</groupId> <artifactId>spring-security-core</artifactId> <version>${spring.version}</version> </dependency> <dependency> <groupId>org.springframework.security</groupId> <artifactId>spring-security-taglibs</artifactId> <version>${spring.version}</version> </dependency> <dependency> <groupId>org.springframework.security</groupId> <artifactId>spring-security-config</artifactId> <version>${spring.version}</version> </dependency> <dependency> <groupId>org.springframework.security</groupId> <artifactId>spring-security-web</artifactId> <version>${spring.version}</version> </dependency> |
Spring Security Configuration
Previously, we’ve already added Spring’s ContextLoaderListener to our web.xml. By default Spring looks for the configuration file /WEB-INF/applicationContext.xml. For this tutorial we’re going to put the Spring Security related configuration into a separate file called applicationContext-security.xml. To tell Spring to use both these configuration files we’ll have to add a <context-param> called contextConfigLocation to our web.xml:
|
1 2 3 4 5 6 7 8 |
<context-param> <param-name>contextConfigLocation</param-name> <param-value>/WEB-INF/applicationContext.xml /WEB-INF/applicationContext-security.xml</param-value> </context-param> <listener> <listener-class>org.springframework.web.context.ContextLoaderListener</listener-class> </listener> |
Create the file /WEB-INF/applicationContext-security.xml and enter the following lines:
|
1 2 3 4 5 6 7 8 9 10 11 12 13 14 15 16 17 18 19 20 21 22 23 24 |
<?xml version="1.0" encoding="UTF-8"?> <beans xmlns=http://www.springframework.org/schema/beans xmlns:xsi=http://www.w3.org/2001/XMLSchema-instance xmlns:security=http://www.springframework.org/schema/security xsi:schemaLocation="http://www.springframework.org/schema/beans http://www.springframework.org/schema/beans/spring-beans-3.1.xsd http://www.springframework.org/schema/beans http://www.springframework.org/schema/beans/spring-beans-3.1.xsd http://www.springframework.org/schema/security http://www.springframework.org/schema/security/spring-security-3.1.xsd"> <security:authentication-manager alias="authenticationManager"> <security:authentication-provider> <!-- TODO change this to reference a real production environment user service --> <security:user-service> <security:user name="admin" password="admin" authorities="ROLE_ADMIN, ROLE_USER"/> <security:user name="user" password="user" authorities="ROLE_USER"/> </security:user-service> </security:authentication-provider> </security:authentication-manager> <security:global-method-security secured-annotations="enabled" /> </beans> |
Setting up Wicket
Create a new class to represent a user session. Name it SecureWicketAuthenticatedWebSession and have it extend AuthenticatedWebSession. Inject the Spring AuthenticationManager that you’ve configured in applicationContext-security.xml. Have your class override the authenticate() method and implement getRoles(). You should end up with something like this:
|
1 2 3 4 5 6 7 8 9 10 11 12 13 14 15 16 17 18 19 20 21 22 23 24 25 26 27 28 29 30 31 32 33 34 35 36 37 38 39 40 41 42 43 44 45 46 47 48 49 50 51 52 53 54 55 56 57 58 59 60 61 62 63 64 65 66 67 68 69 70 71 72 73 74 |
package nl.wimvanhaaren.securewicket.web.security; import org.apache.log4j.Logger; import org.apache.wicket.authroles.authentication.AuthenticatedWebSession; import org.apache.wicket.authroles.authorization.strategies.role.Roles; import org.apache.wicket.injection.Injector; import org.apache.wicket.request.Request; import org.apache.wicket.spring.injection.annot.SpringBean; import org.springframework.security.authentication.AuthenticationManager; import org.springframework.security.authentication.UsernamePasswordAuthenticationToken; import org.springframework.security.core.Authentication; import org.springframework.security.core.AuthenticationException; import org.springframework.security.core.GrantedAuthority; import org.springframework.security.core.context.SecurityContextHolder; public class SecureWicketAuthenticatedWebSession extends AuthenticatedWebSession { private static final long serialVersionUID = 3355101222374558750L; private static final Logger logger = Logger.getLogger(SecureWicketAuthenticatedWebSession.class); @SpringBean(name = "authenticationManager") private AuthenticationManager authenticationManager; public SecureWicketAuthenticatedWebSession(Request request) { super(request); injectDependencies(); ensureDependenciesNotNull(); } private void ensureDependenciesNotNull() { if (authenticationManager == null) { throw new IllegalStateException("An authenticationManager is required."); } } private void injectDependencies() { Injector.get().inject(this); } @Override public boolean authenticate(String username, String password) { boolean authenticated = false; try { Authentication authentication = authenticationManager.authenticate(new UsernamePasswordAuthenticationToken(username, password)); SecurityContextHolder.getContext().setAuthentication(authentication); authenticated = authentication.isAuthenticated(); } catch (AuthenticationException e) { logger.warn(String.format("User '%s' failed to login. Reason: %s", username, e.getMessage())); authenticated = false; } return authenticated; } @Override public Roles getRoles() { Roles roles = new Roles(); getRolesIfSignedIn(roles); return roles; } private void getRolesIfSignedIn(Roles roles) { if (isSignedIn()) { Authentication authentication = SecurityContextHolder.getContext().getAuthentication(); addRolesFromAuthentication(roles, authentication); } } private void addRolesFromAuthentication(Roles roles, Authentication authentication) { for (GrantedAuthority authority : authentication.getAuthorities()) { roles.add(authority.getAuthority()); } } } |
Next you have to change your Wicket Application from a WebApplication to an AuthenticatedWebApplication:
|
1 2 3 4 5 6 7 8 9 10 11 12 13 14 15 16 17 18 19 20 21 22 23 24 25 26 27 28 29 30 31 32 33 34 35 36 37 38 39 40 41 42 43 44 45 46 47 48 49 50 51 52 53 54 |
package nl.wimvanhaaren.securewicket.web; import nl.wimvanhaaren.securewicket.web.security.SecureWicketAuthenticatedWebSession; import nl.wimvanhaaren.wicket.WebResourceStreamLocator; import org.apache.wicket.authroles.authentication.AbstractAuthenticatedWebSession; import org.apache.wicket.authroles.authentication.AuthenticatedWebApplication; import org.apache.wicket.markup.html.WebPage; import org.apache.wicket.spring.injection.annot.SpringComponentInjector; import org.apache.wicket.util.file.WebApplicationPath; /** * Application object for your web application. If you want to run this * application without deploying, run the Start class. * * @see nl.wimvanhaaren.securewicket.web.Start#main(String[]) */ public class WicketApplication extends AuthenticatedWebApplication { private boolean isInitialized = false; @Override public void init() { if (!isInitialized) { super.init(); // Use our custom resource finder WebApplicationPath webContainerPathFinder = new WebApplicationPath(getServletContext()); WebResourceStreamLocator resourceStreamLocator = new WebResourceStreamLocator(webContainerPathFinder); getResourceSettings().setResourceStreamLocator(resourceStreamLocator); // Integrate Spring with Wicket getComponentInstantiationListeners().add(new SpringComponentInjector(this)); isInitialized = true; } } @Override public Class<HomePage> getHomePage() { return HomePage.class; } @Override protected Class<? extends AbstractAuthenticatedWebSession> getWebSessionClass() { return SecureWicketAuthenticatedWebSession.class; } @Override protected Class<? extends WebPage> getSignInPageClass() { return LoginPage.class; } } |
Secured pages and the login form
Finally, we have to create some secured pages and a login form.
LoginPage.java:
|
1 2 3 4 5 6 7 8 9 10 11 12 13 14 15 16 17 18 19 20 21 22 23 24 25 26 27 28 29 30 31 32 33 34 35 36 37 38 39 40 41 42 43 44 45 46 47 48 49 50 51 52 53 54 55 56 57 |
package nl.wimvanhaaren.securewicket.web; import org.apache.wicket.authroles.authentication.AuthenticatedWebSession; import org.apache.wicket.feedback.ComponentFeedbackMessageFilter; import org.apache.wicket.markup.html.WebPage; import org.apache.wicket.markup.html.basic.Label; import org.apache.wicket.markup.html.form.PasswordTextField; import org.apache.wicket.markup.html.form.RequiredTextField; import org.apache.wicket.markup.html.form.StatelessForm; import org.apache.wicket.markup.html.panel.ComponentFeedbackPanel; import org.apache.wicket.markup.html.panel.FeedbackPanel; import org.apache.wicket.model.CompoundPropertyModel; public class LoginPage extends WebPage { public LoginPage() { final LoginForm form = new LoginForm("loginForm"); add(form); } private static class LoginForm extends StatelessForm { private static final long serialVersionUID = -6826853507535977683L; private String username; private String password; public LoginForm(String id) { super(id); setModel(new CompoundPropertyModel(this)); add(new Label("usernameLabel", getString("login.username.label", null, "Username"))); add(new RequiredTextField("username")); add(new Label("passwordLabel", getString("login.password.label", null, "Username"))); add(new PasswordTextField("password")); add(new FeedbackPanel("feedback")); } @Override protected void onSubmit() { AuthenticatedWebSession session = AuthenticatedWebSession.get(); if (session.signIn(username, password)) { setDefaultResponsePageIfNecessary(); } else { error(getString("login.failed.badcredentials")); } } private void setDefaultResponsePageIfNecessary() { if (!continueToOriginalDestination()) { setResponsePage(getApplication().getHomePage()); } } } } |
LoginPage.html:
|
1 2 3 4 5 6 7 8 9 10 11 12 13 14 15 16 17 18 19 20 21 22 23 24 25 26 27 |
<!DOCTYPE html> <html xmlns:wicket="http://wicket.apache.org"> <head> <meta charset="utf-8" /> <title>LoginPage</title> <link rel="stylesheet" href="style.css" type="text/css" media="screen" title="Stylesheet" /> </head> <body> <form wicket:id="loginForm"> <span wicket:id="usernameLabel">Username</span>:<br /> <input type="text" wicket:id="username" /><br /> <br /> <span wicket:id="passwordLabel">Username</span>:<br /> <input type="password" wicket:id="password" /><br /> <br /> <input type="submit" wicket:message="value:login.submit.label" /> <div id="errorMessages" wicket:id="feedback"></div> </form> <p> <i>Hint: try user/user or admin/admin</i> </p> </body> </html> |
UserPage.java:
|
1 2 3 4 5 6 7 8 9 |
package nl.wimvanhaaren.securewicket.web; import org.apache.wicket.authroles.authorization.strategies.role.annotations.AuthorizeInstantiation; import org.apache.wicket.markup.html.WebPage; @AuthorizeInstantiation("ROLE_USER") public class UserPage extends WebPage { } |
UserPage.html:
|
1 2 3 4 5 6 7 8 9 10 11 12 13 |
<!DOCTYPE html> <html xmlns:wicket="http://wicket.apache.org"> <head> <meta charset="utf-8" /> <title>UserPage</title> <link rel="stylesheet" href="style.css" type="text/css" media="screen" title="Stylesheet" /> </head> <body> <h1>This page is only available for authenticated users.</h1> </body> </html> |
AdminPage.java:
|
1 2 3 4 5 6 7 8 9 |
package nl.wimvanhaaren.securewicket.web.admin; import org.apache.wicket.authroles.authorization.strategies.role.annotations.AuthorizeInstantiation; import org.apache.wicket.markup.html.WebPage; @AuthorizeInstantiation("ROLE_ADMIN") public class AdminPage extends WebPage { } |
AdminPage.html:
|
1 2 3 4 5 6 7 8 9 10 11 12 13 |
<!DOCTYPE html> <html xmlns:wicket="http://wicket.apache.org"> <head> <meta charset="utf-8" /> <title>AdminPage</title> <link rel="stylesheet" href="style.css" type="text/css" media="screen" title="Stylesheet" /> </head> <body> <h1>This page is only available for authenticated administrators.</h1> </body> </html> |
Put some links on the HomePage to get to the secured pages.
HomePage.java:
|
1 2 3 4 5 6 7 8 9 10 11 12 13 14 15 |
add(new Link("linkToUserPage"){ @Override public void onClick() { Page next = new UserPage(); setResponsePage(next); } }); add(new Link("linkToAdminPage"){ @Override public void onClick() { Page next = new AdminPage(); setResponsePage(next); } }); |
HomePage.html:
|
1 2 3 4 |
<ul> <li><a href="#" wicket:id="linkToUserPage">user page</a></li> <li><a href="#" wicket:id="linkToAdminPage">admin page</a></li> </ul> |
Test run
Now, if your start up your wicket application you will have Spring Security handling the authentication and user session whilst Wicket Auth/Roles handles the authorization of the secured pages.
If you select one of the links without being logged in you will be taken to the login page: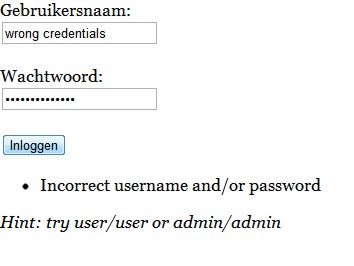
If you manage to log in correctly, you can then navigate to the secured pages for which you are authorized:
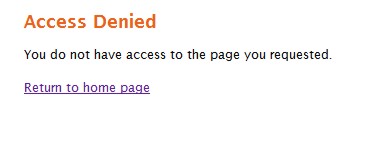
If, on the other hand, you try to access a page for which you are not authorized, you will be treated to the Access Denied message:
So that’s it. You now have a basic Wicket project setup that uses Spring Security to look up the user (including roles), validate the password, and manage the current user session. Wicket Auth/Roles is used for authorization. It validates whether the current user has access to a particular page.
Source code: secureWicket-source

You need follow the example here: https://github.com/thombergs/wicket-spring-security-example
To make spring keep the context you need to config springSecurity filter otherwise spring will not save the context.
As I ran source code then I found -SecurityContextHolder.getContext().getAuthentication() returns null from addRolesFromAuthentication() method.